Glade: The Gingee Admin Panel
Glade is the official, web-based administration panel that is bundled with every Gingee server. It provides a simple, secure, and powerful user interface for managing the entire lifecycle of all applications running on your server instance.
Glade is itself a Gingee application, built to showcase the platform's capabilities. It is a privileged app, meaning it has special permission to use the powerful platform module to perform its administrative tasks.
First-Time Access & Login
When you create a new Gingee project using the gingee-cli init command, the Glade application is automatically installed and configured for you.
-
Initial Credentials: During the
initwizard, you are prompted for an administrator username and password. The CLI securely hashes the password using Argon2 and stores these credentials inside Glade's configuration file. -
Configuration File: The credentials are saved in
web/glade/box/app.json:{ "name": "glade", "env": { "ADMIN_USERNAME": "admin", "ADMIN_PASSWORD_HASH": "$argon2id$v=19$m=..." } } -
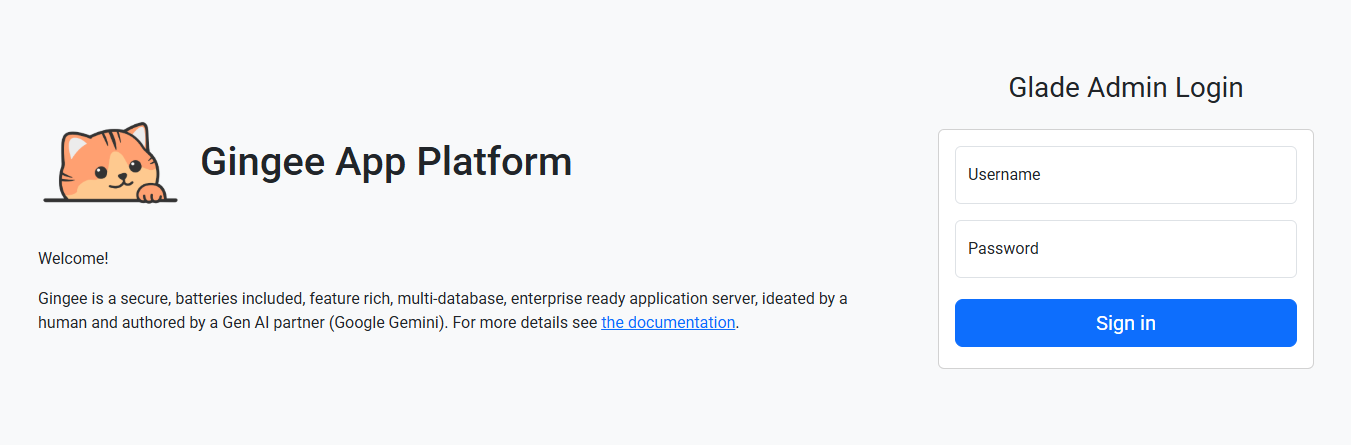
Accessing Glade: By default, Gingee is configured to make Glade the
default_app. To access it, simply navigate your browser to the root URL of your running server (e.g.,http://localhost:7070). You will be automatically directed to the Glade login page.
The Dashboard View
After a successful login, you are taken to the main Glade dashboard. This is your central hub for viewing and managing all applications.
Login
Dashboard
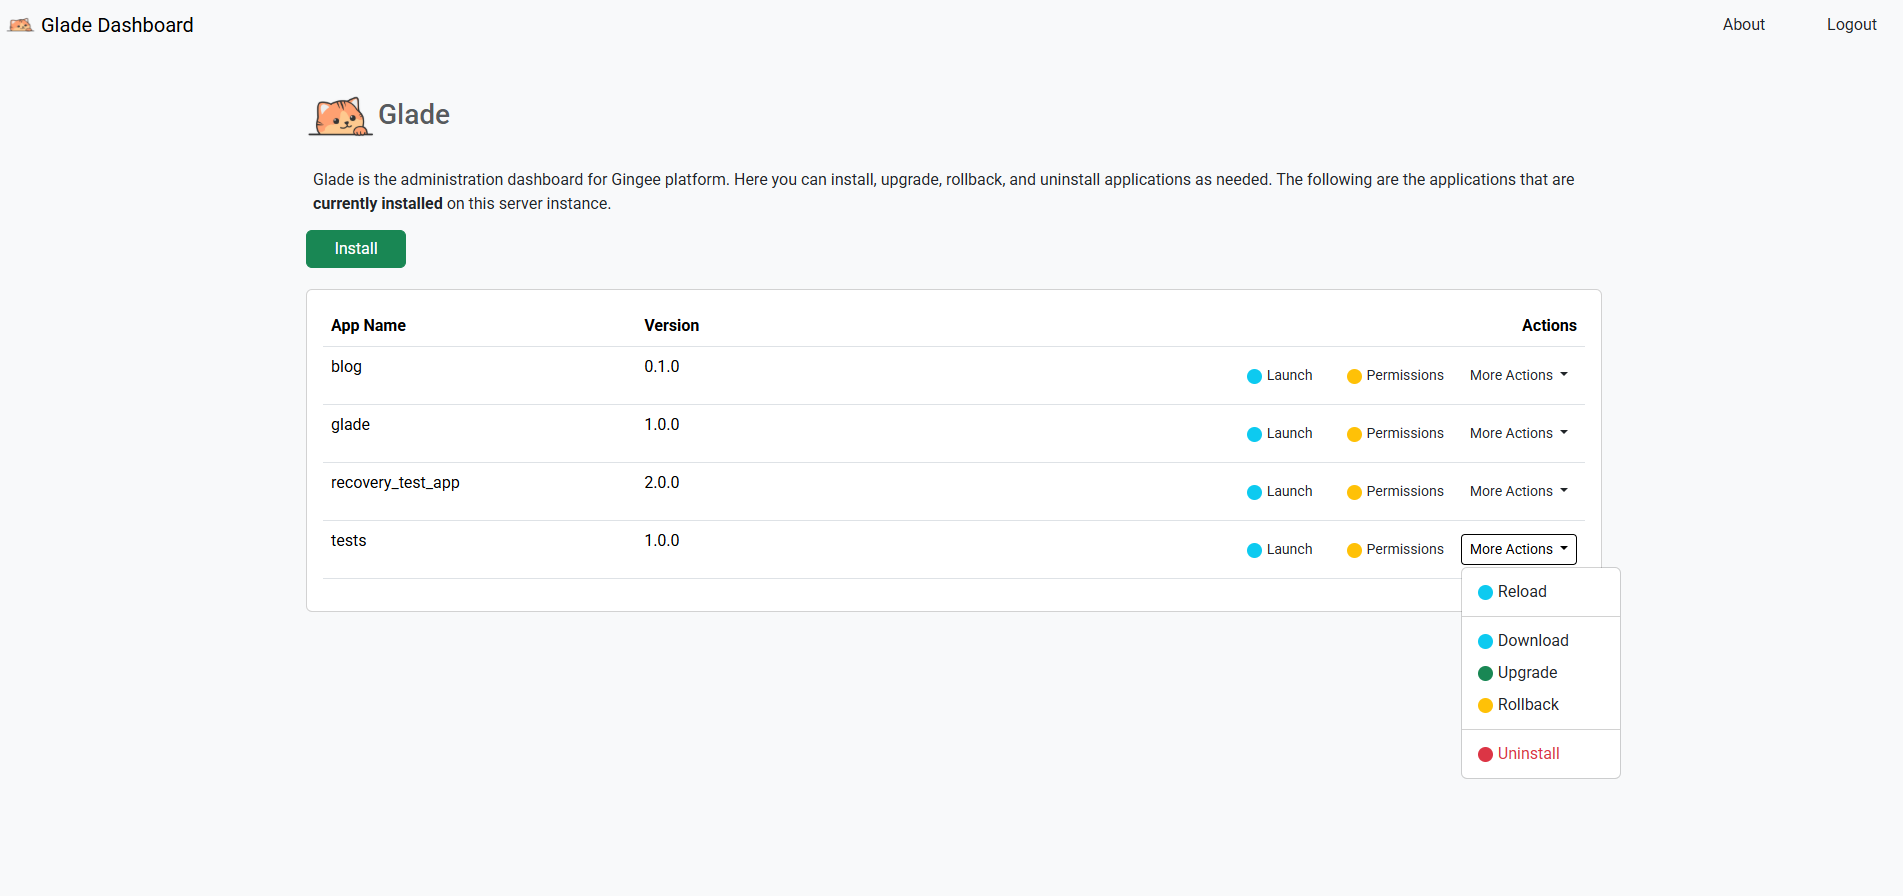
The dashboard consists of two main components:
- The Header: Contains the Glade title, Schedules, Queue / DLQ, Logs (server + app log files), and a Logout button to securely end your session.
- The Application List: A table that displays every application currently installed and running on the Gingee server.
- App Name: The unique ID of the application (corresponds to its folder name in
web/). - Version: The version number, as specified in the app's own
app.jsonfile. - Actions: A set of buttons for performing lifecycle operations on each application.
- App Name: The unique ID of the application (corresponds to its folder name in
Core Features: Application Lifecycle Management
All major application management tasks can be performed directly from the Glade UI.
Installing a New Application
This is for deploying a new application from a package file. Glade provides an intelligent, multi-step wizard to ensure applications are installed securely and correctly.
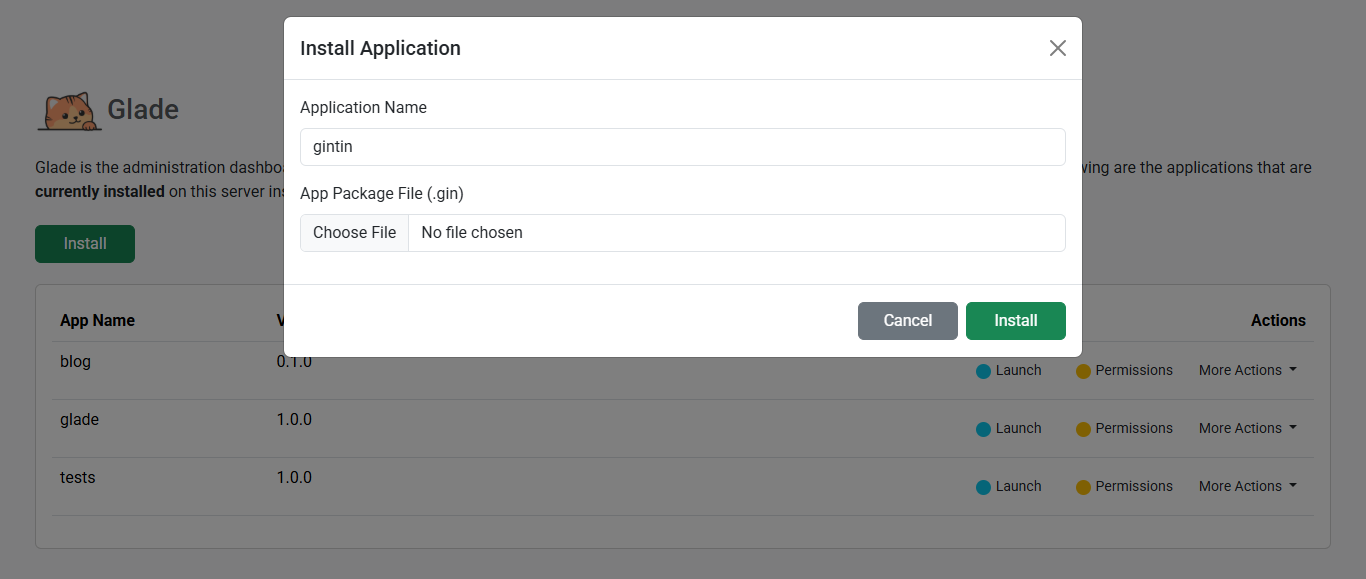
- Click the green Install button at the top of the application list.
- A modal dialog will appear, prompting for the Application Name and the App Package File (.gin).
- Upon selecting a
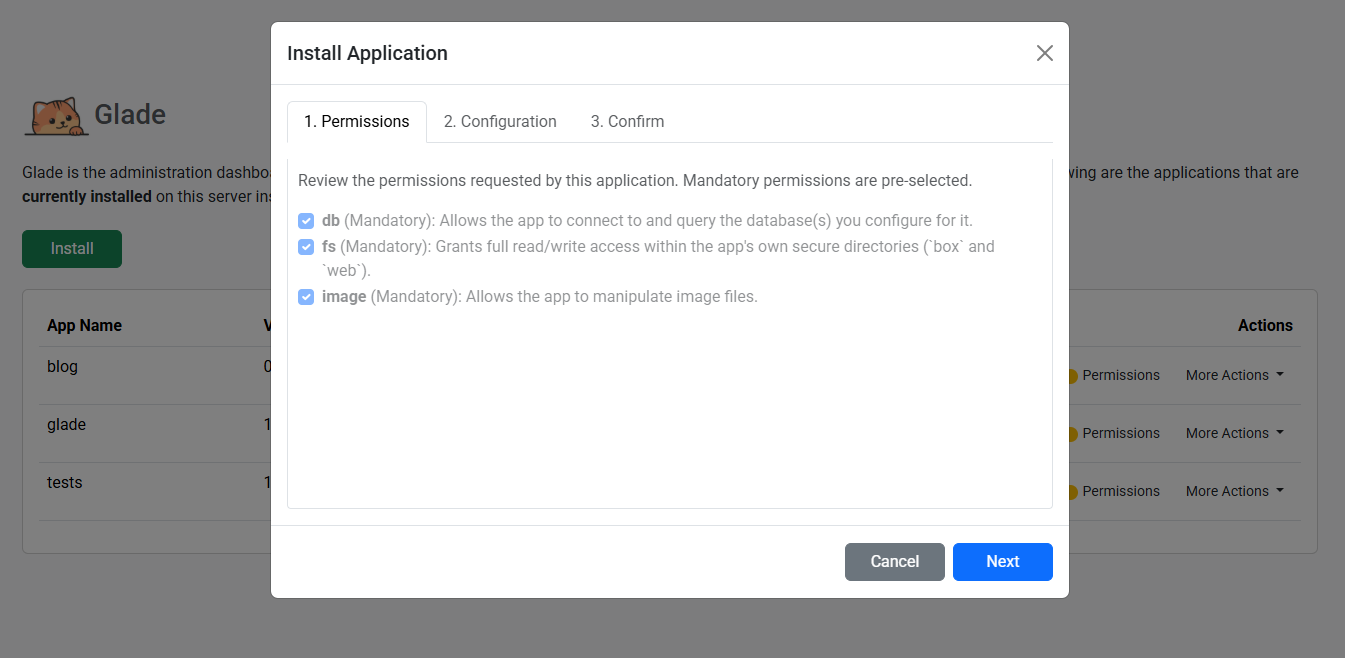
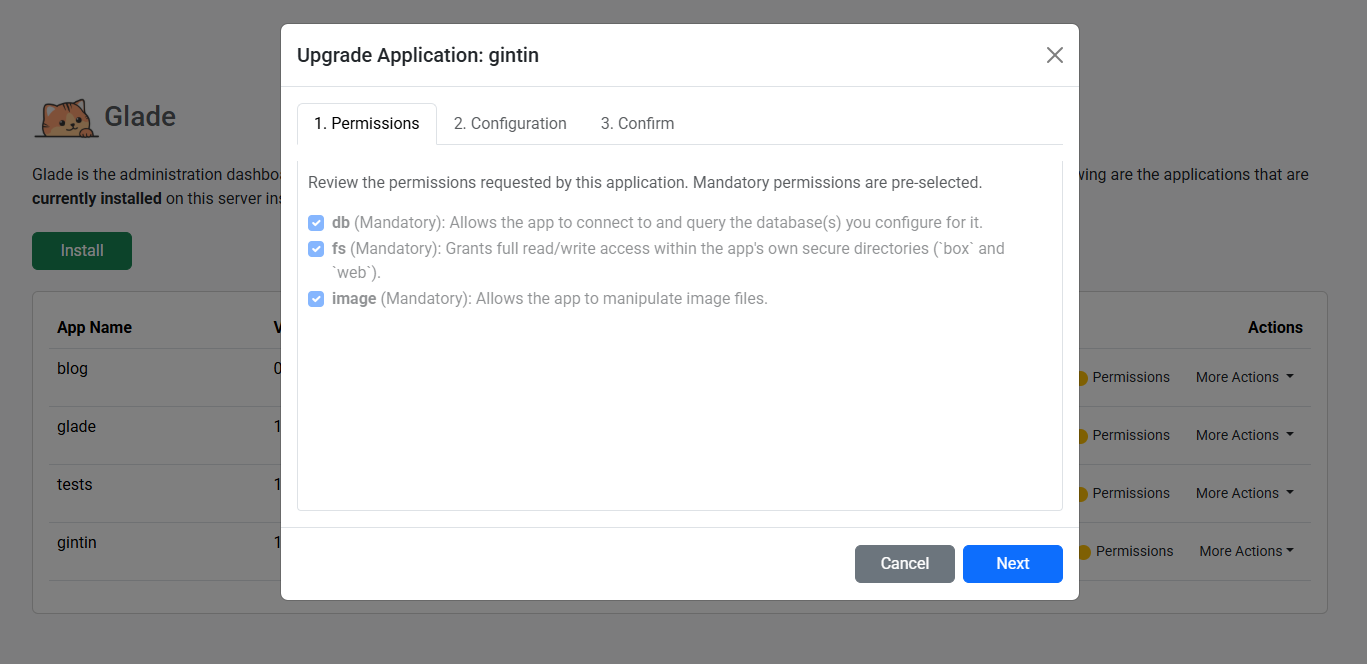
.ginfile, Glade analyzes the package in your browser and transforms the modal into a tabbed installation wizard. - Permissions Tab: The first tab will display the
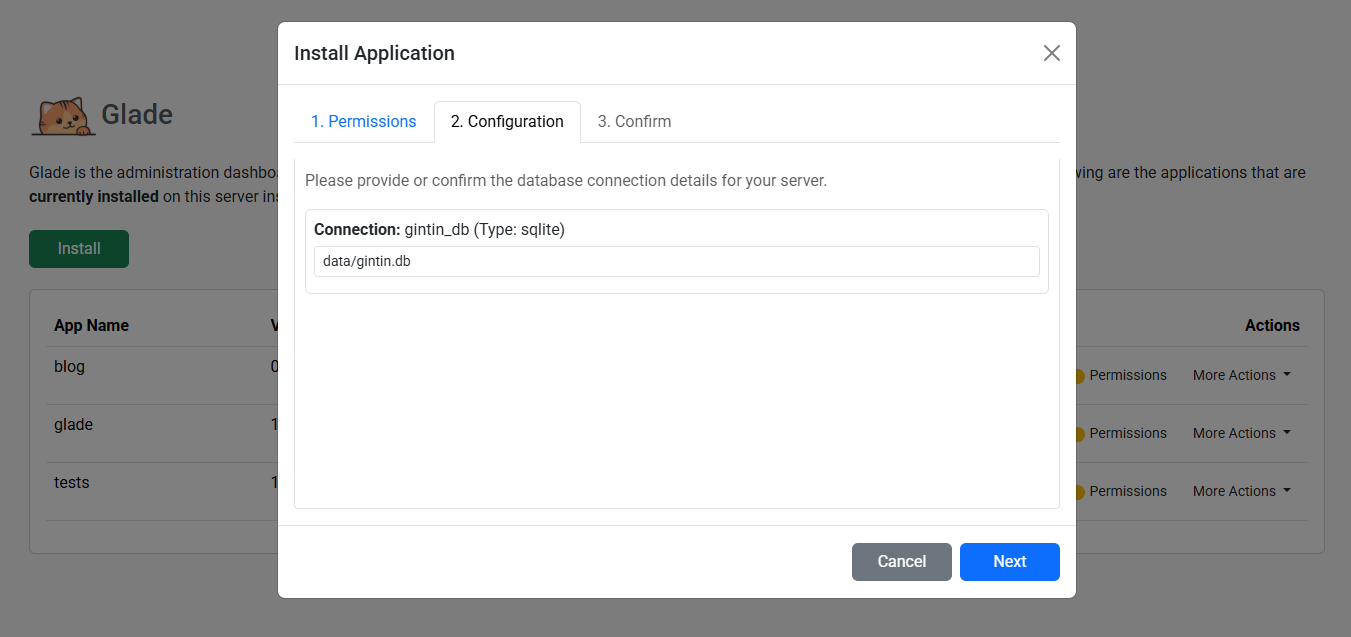
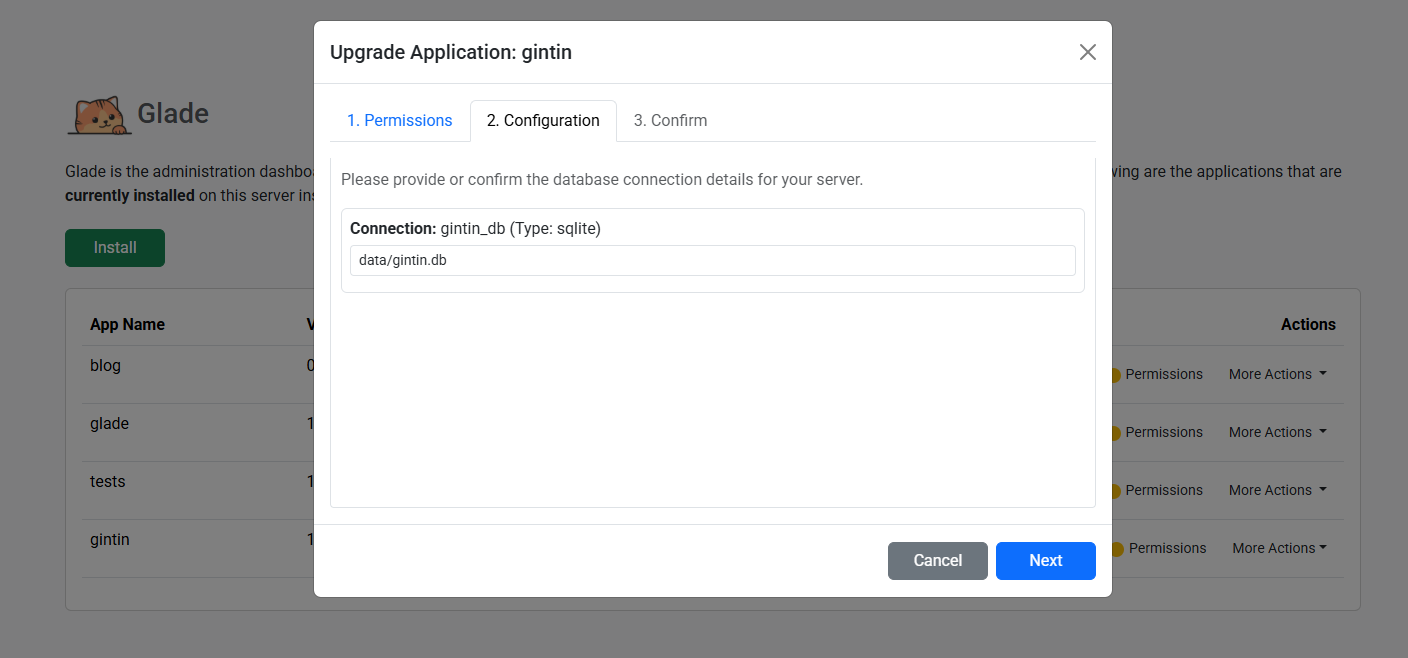
mandatoryandoptionalpermissions the application requires (read from itspmft.jsonmanifest). You must review and consent to these permissions before proceeding. - Configuration Tab: If the application requires any database connections, this tab will display a form for you to enter the connection details (host, user, password, etc.). For apps with multiple database requirements, this will be displayed as a convenient accordion.
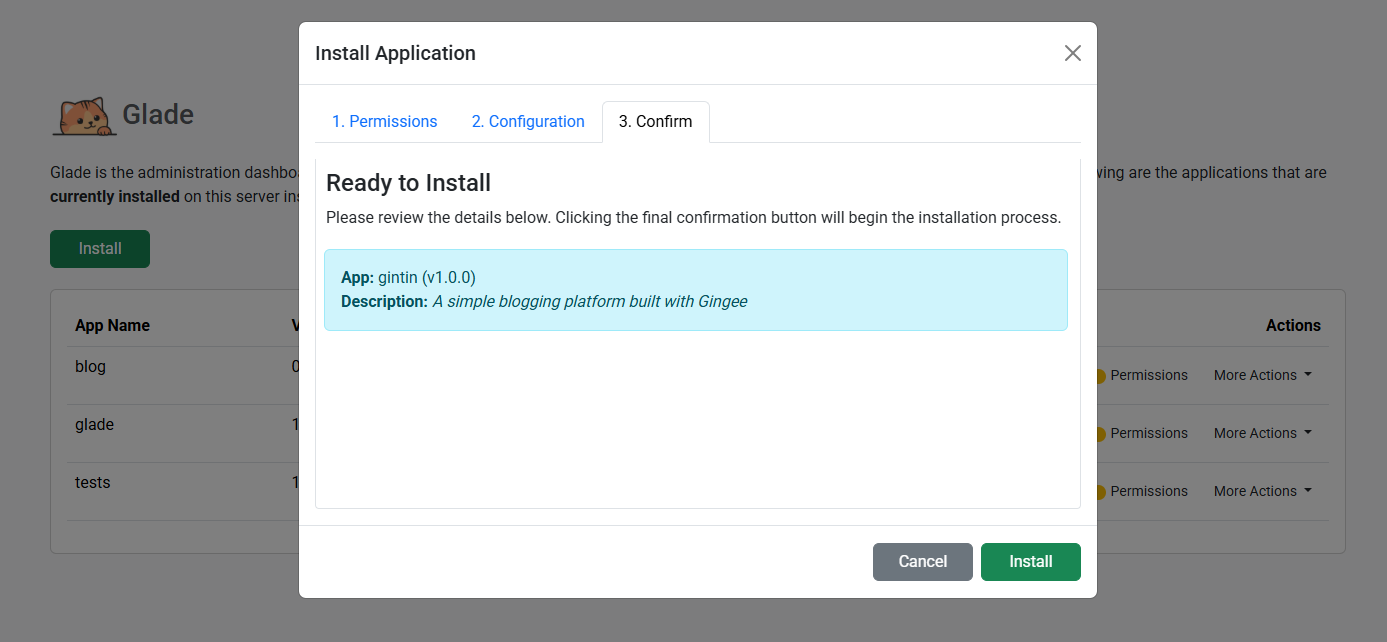
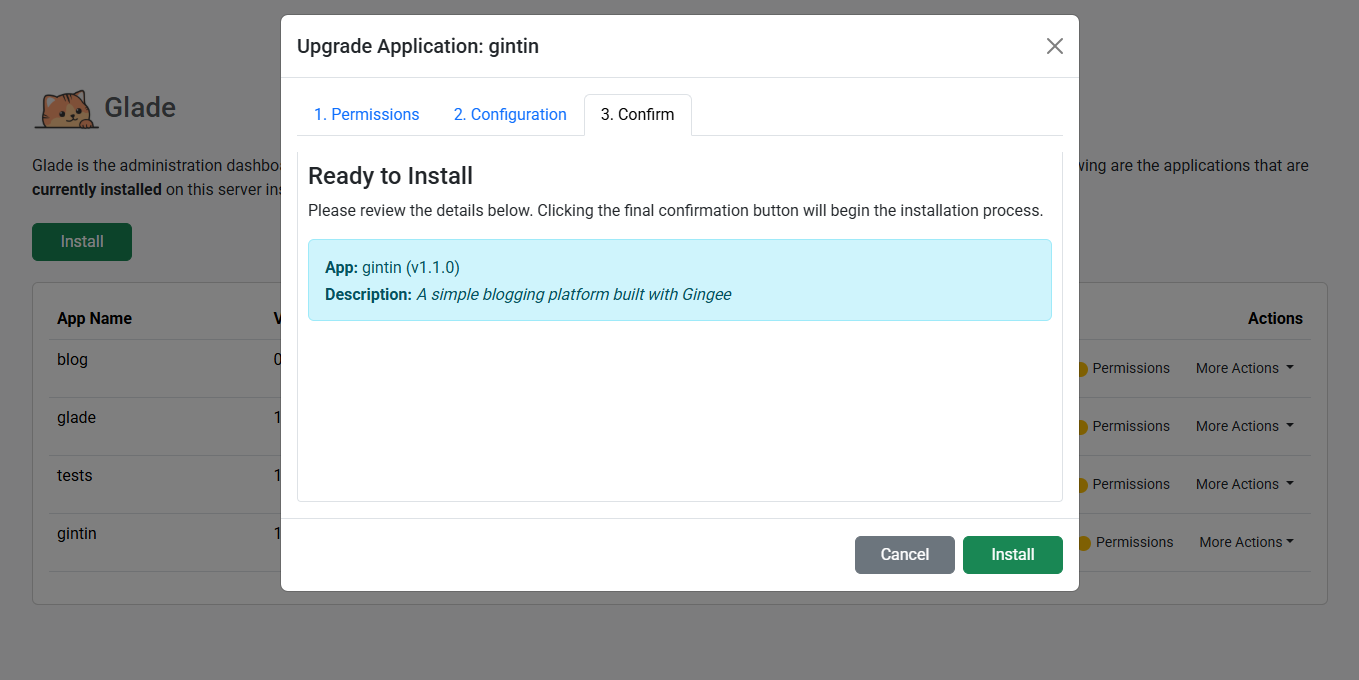
- Confirm Tab: A final tab shows a summary of the installation.
- Clicking Confirm & Install securely repackages the application with your provided database configuration and installs it on the server with only the permissions you explicitly granted. The application list will then automatically refresh.
Upload App Package(.gin) File
Grant Permissions
Configure App
Confirm Install
Managing App Permissions
Security is managed at the application level. You can review and change the permissions for any installed app at any time.
- In the application list, find the app you wish to configure and click its gray Permissions button.
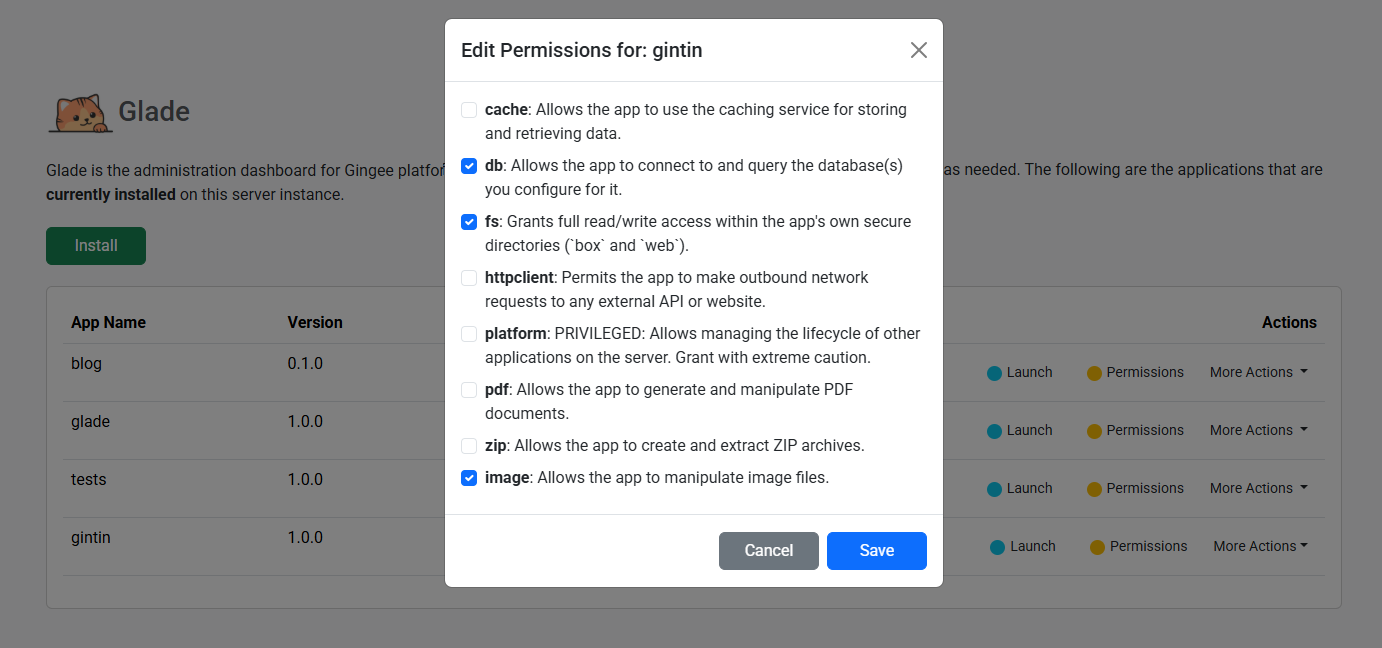
- A modal dialog will appear, listing all available permissions in the Gingee platform.
- Checkboxes will indicate the permissions currently granted to the app.
- You can grant or revoke permissions by toggling the checkboxes.
- Click Save. Glade will securely update the server's central permissions file and then automatically trigger a safe reload of the application to ensure the new rules are applied immediately.
Upgrading an Application
This is for deploying a new version of an existing application. The process is nearly identical to a new installation, ensuring the same level of security and configuration.
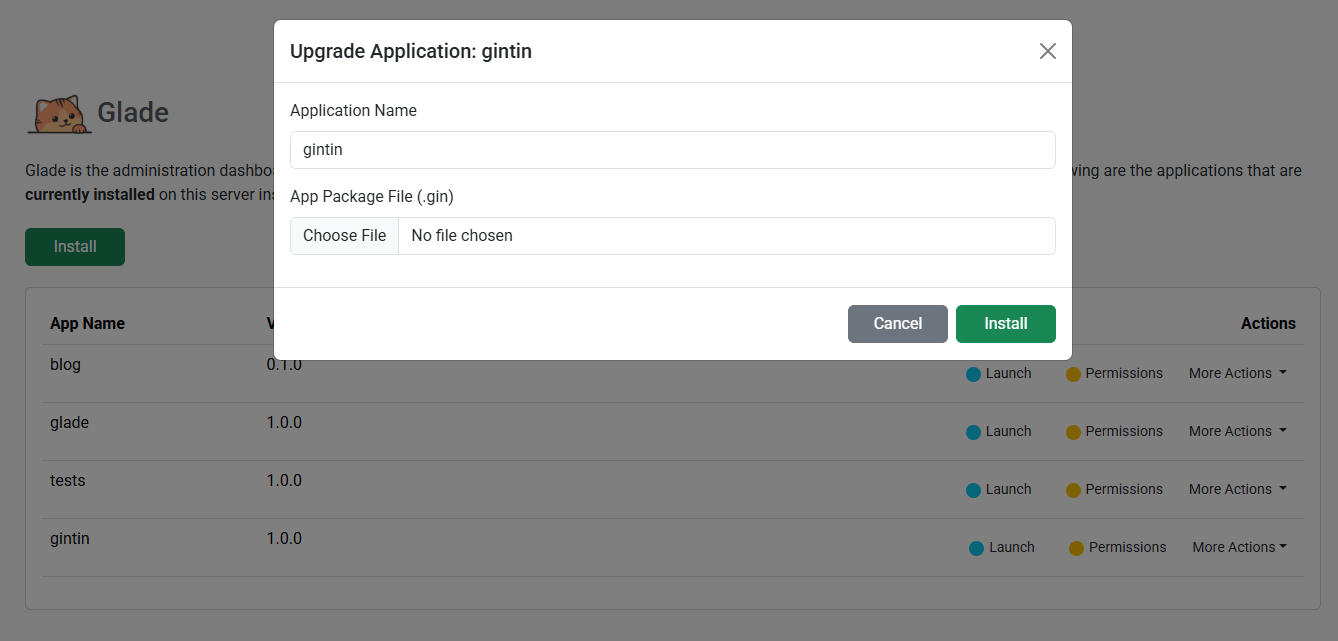
- In the application list, find the app you wish to upgrade and click its blue Upgrade button.
- The installation wizard will appear, but the "Application Name" field will be pre-filled and read-only.
- After you select the new
.ginpackage file, the wizard will analyze it and guide you through the same Permissions and Configuration tabs, allowing you to approve any new permissions the upgraded version requires. - Glade will perform a secure, data-aware upgrade, creating a backup of the previous version before replacing the application's code.
Upload App Package(.gin) File
Grant Permissions
Configure App
Confirm Upgrade
Packaging an Application (Download)
This allows you to create a distributable .gin package from a live, running application.
- In the application list, find the app you want to package.
- Click its Download button.
- Your browser will immediately begin downloading a
<app-name>.ginfile. This file can be used to install the application on another Gingee server or for backup purposes.
Rolling Back an Application
If a recent upgrade has caused issues, you can quickly and safely revert to the previous version.
- In the application list, find the app you wish to roll back.
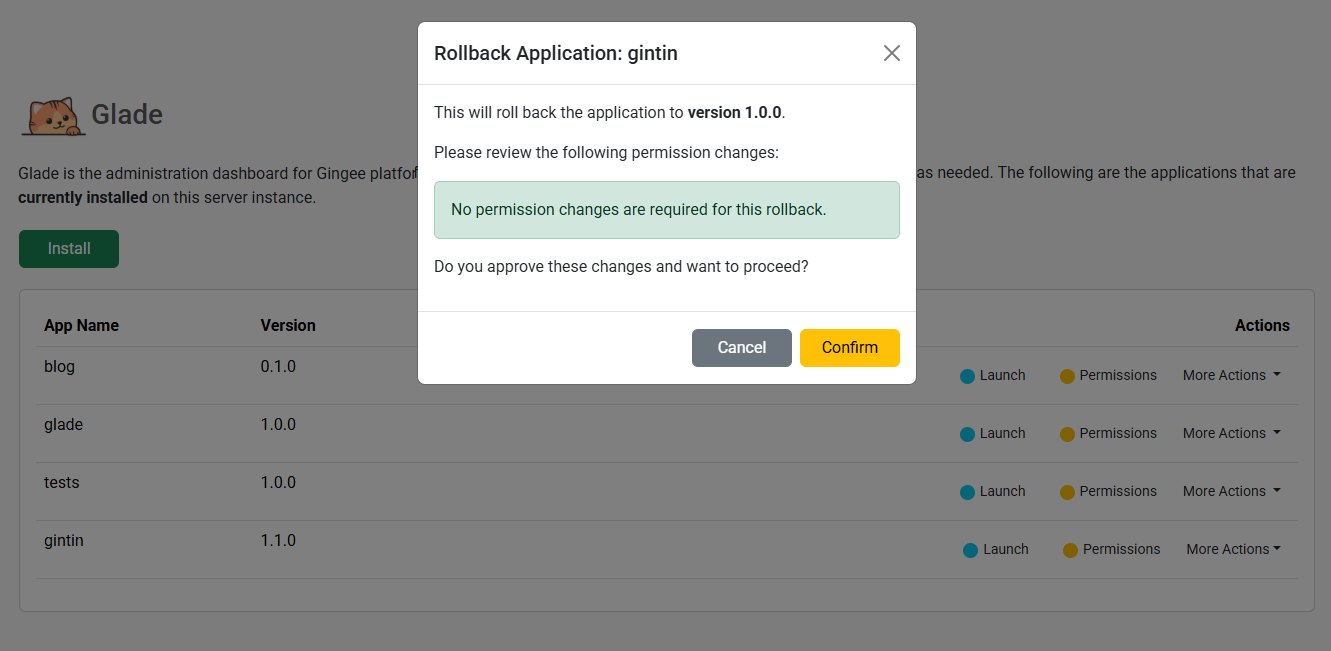
- Click its yellow Rollback button.
- A confirmation modal will appear. Glade first analyzes the latest backup and presents a clear "diff," showing you which permissions will be granted or revoked if you proceed with the rollback.
- After you approve any permission changes, click the Confirm button. Glade will perform a safe, data-preserving rollback to the most recent backup of that application and apply the correct set of permissions.
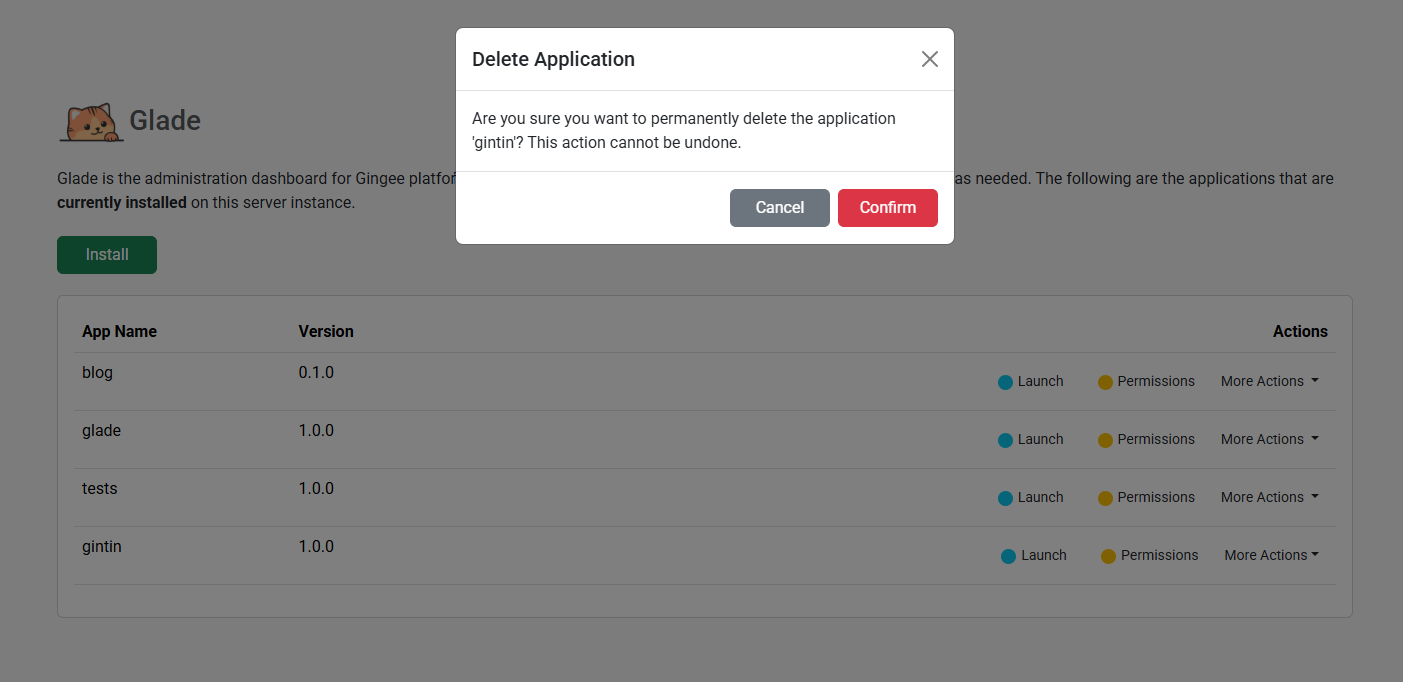
Uninstalling an Application
This is a destructive action that will permanently remove an application and all of its associated configuration and content.
- In the application list, find the app you wish to uninstall.
- Click its red Uninstall button.
- A confirmation modal will appear, asking you to type the application's name to confirm this irreversible action.
- Click the Confirm button. Glade will gracefully shut down the application's services, revoke its permissions, clear its caches, and delete its entire directory from the server.
Logs (server & app files)
Top nav Logs opens a viewer for this Gingee process only:
- Scope Server (default) — files under project
logs/gingee-YYYY-MM-DD.log. Includes engine lines and app-forwarded lines (JSON fieldapp). Optional Engine only hides forwarded app lines. - Scope App — files under
web/<app>/box/logs/app-YYYY-MM-DD.logfor any installed app, including glade. - File dropdown (
.logonly; rotated.gznot opened), level filter, search in the current window, default last 100 lines. - Hide log-viewer requests is on by default — filters out noise from the Logs UI itself (
logs-list.js/logs-read.jsexecute/reload/response lines). Uncheck to see those lines. - Auto-refresh is off by default; optional 4s poll while the modal is open.
APIs: platform.listLogFiles / readLogFile → /glade/api/logs-list, /glade/api/logs-read. Paths are jailed to the server logs directory and each app’s box/logs.
Schedules (CRON / Run now)
The top navigation bar includes a Schedules control. It opens an admin panel for jobs registered on this node from app.json → schedules (only when gingee.json → scheduler.enabled is true):
- Status — enabled flag, default timezone, coordination driver, job count, currently running.
- Job list — app, name, cron, target summary (script / url / queue), next run, last status.
- App filter — type 3+ letters to filter by app name (live).
- Run now — executes that job immediately on this node (bypasses multi-node coordination locks so an operator can always trigger a run). Shows last status after completion.
APIs: platform.getSchedulerStatus / listSchedulerJobs / runSchedulerJob (also /glade/api/schedule-list, /glade/api/schedule-run). If the scheduler is disabled, the list is empty and an info banner explains why.
Queue / Live jobs & Dead Letter Queue (DLQ)
The top navigation bar includes a Queue / DLQ control (next to Schedules / About / Logout). It opens an admin panel for the engine background job system (gingee.json → queue):
- Stats — driver, in-flight / waiting on this node, driver pending / delayed counts (redis = shared fleet), concurrency, DLQ size.
- Live jobs tab — running and waiting jobs on this node, plus pending/delayed in the driver. Optional Auto-refresh (every 3s) while the modal is open.
- Dead letter (DLQ) tab — jobs that exhausted retries. Retry re-enqueues with attempt 1 and a fresh
default_attemptsbudget; Discard removes the entry. - App filter — type 3+ letters to filter live + DLQ tables by app name.
State legend: running / waiting = this node; pending / delayed = driver pool (memory local; redis shared). Memory DLQ is lost on restart; Redis DLQ is durable (TTL). APIs: platform.getQueueStats / listQueueLiveJobs / listQueueDlq / … (/glade/api/queue-*). See Server Config → queue.
Audit trail (server-side)
Glade actions that change permissions or app lifecycle (install, upgrade, reload, rollback, uninstall, permission save) are recorded by the engine in an append-only JSONL audit log. By default this is logs/audit.jsonl relative to the project root (gingee.json → audit). Each line includes timestamp, event name, actor (typically glade), target app, and details (for example previous vs granted permissions). This is separate from application request logs—see Server Config → audit.
Administration & Security
Logging Out
To securely end your administrative session, simply click the Logout button in the top-right corner of the header. This will delete your session on the server and clear the authentication cookie from your browser.
Resetting the Admin Password
If you forget your Glade password, you cannot recover it. However, if you have command-line access to the server where Gingee is running, you can securely reset it.
- Navigate to the root of your Gingee project directory in the terminal.
- Run the following command from the
gingee-cli:gingee-cli reset-pwd - The tool will prompt you to enter and confirm a new password.
- It will then generate a new, secure password hash.
- Copy this entire hash and paste it into your
web/glade/box/app.jsonfile, replacing the old value for theADMIN_PASSWORD_HASHkey. - Restart your Gingee server. You will now be able to log in with your new password.